Payment Integration & Credits System
Payment Integration & Credit System for Tuning File Platform
Our tuning file management platform allows users to make payments seamlessly through PayPal and Stripe, providing multiple payment options to manage their credit balances. There are two types of credits available for your ECU file management software:
Tuning Credits
Used for tuning-related services.
EVC Credits
Required for file transfer processes.
Users must purchase these credits to proceed with tuning or file transfers.
1. Setting Up PayPal Payment Integration
To enable PayPal payments on our platform, follow these steps:
Step 1: Create a PayPal Business Account
To accept payments, you need a PayPal Business Account.
- Go to the PayPal Developer Portal: Sign Up for PayPal
- Click on Sign Up and choose Business Account.
- Fill in your business details and complete the verification process.
- Once your account is set up, log in to your PayPal Developer Dashboard: PayPal Developer Login
Step 2: Obtain PayPal Client ID & Secret Key
- After logging into your PayPal Developer Dashboard, click on My Apps & Credentials.
- Under REST API Apps, click Create App.
- Enter a name for your app (e.g., "TuningDesk Payment") and click Create App.
- You will see two environments:
- Sandbox (for testing)
- Live (for real transactions)
- Copy the Client ID and Secret Key from the Live environment.
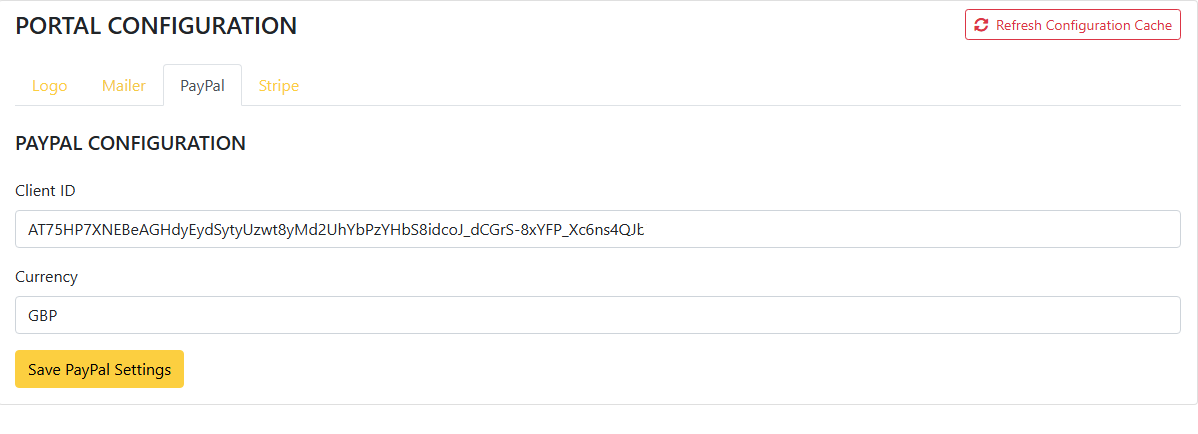
Step 3: Configure PayPal in the Portal
PayPal payment gateway configuration is now handled directly from the Admin Portal. Only Admin users can configure PayPal without editing server files.
- Go to: Admin Portal Configuration
- Open the PayPal tab.
- Add the required PayPal credentials (Client ID, currency, etc.).
- Save the configuration.
Once saved, the PayPal payment gateway becomes active across the portal. Keys are stored securely and internally applied to the environment configuration. Currency can be configured as required (USD, EUR, INR, etc.).
2. Setting Up Stripe Payment Integration
Stripe has been successfully integrated into the portal, providing customers with an additional secure payment option to purchase credits. Stripe works alongside PayPal, allowing customers to choose their preferred payment method at checkout.
Note: Stripe payments are processed securely and instantly. Customers benefit from multiple payment options including credit cards, digital wallets, and more.
Step 1: Create or Log in to Stripe Account
- Visit the Stripe website: Stripe.com
- Click Sign in with your existing account or Sign up to create a new Stripe account.
- Complete the account registration with your business information.
- Verify your identity and complete any required verification steps.
Step 2: Access the Stripe Dashboard
- After logging in, you will be taken to your Stripe Dashboard.
- Ensure your account is fully activated and verified.
- You can view your account status and business information from the Dashboard home page.
Step 3: Get API Keys from Stripe
To integrate Stripe into your platform:
- In the Stripe Dashboard, navigate to Developers → API Keys.
- You will see two types of keys:
- Publishable Key: Used for frontend integrations and visible in your client-side code. This key identifies your account publicly.
- Secret Key: Used for backend/server-side payment processing. Keep this key secure and never expose it in client-side code.
- Keys are available in two modes:
- Test Mode: For testing payments with test card details
- Live Mode: For real customer payments (requires full account verification)
- Copy your Publishable Key and Secret Key for both test and live modes.
Step 4: Test Mode vs Live Mode
Test Mode
- Used for testing payment flows before going live
- Test transactions do not process real payments
- Use Stripe test card numbers to simulate transactions
- No charges will be made during testing
Live Mode
- Used for processing real customer payments
- Requires complete account verification and business documentation
- Real customer payment information is processed
- Transactions are charged to customer payment methods
Recommendation: Always test your payment flow in Test Mode first using test card details. Switch to Live Mode only after verification and testing are complete.
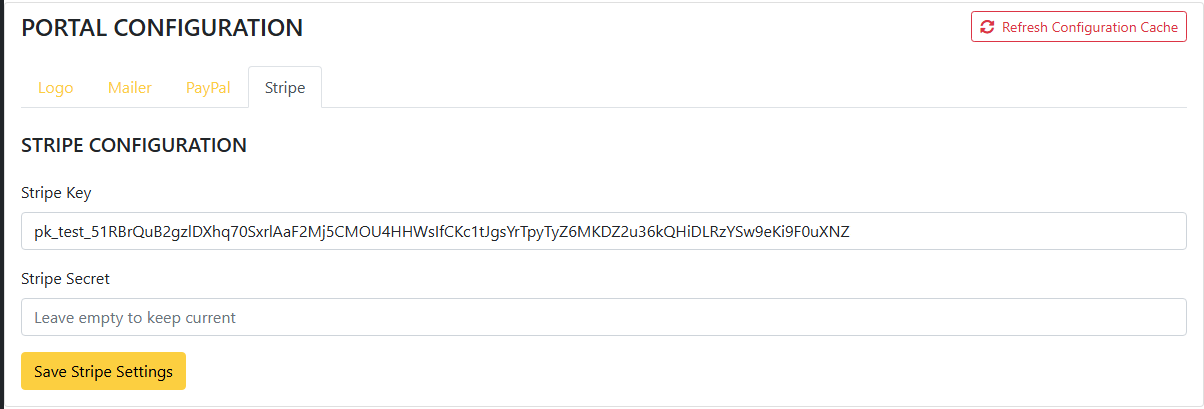
Step 5: Add Stripe Keys to Your Portal
Stripe payment gateway setup is managed directly from the Portal Configuration page. Only Admin users can configure Stripe from the dashboard without manual .env file changes.
- Navigate to: Admin Portal Configuration
- Open the Stripe tab.
- Add your Stripe Publishable Key and Stripe Secret Key.
- Save the settings.
Test and Live keys can be updated anytime. Once saved, the Stripe payment gateway becomes available for credit purchases.
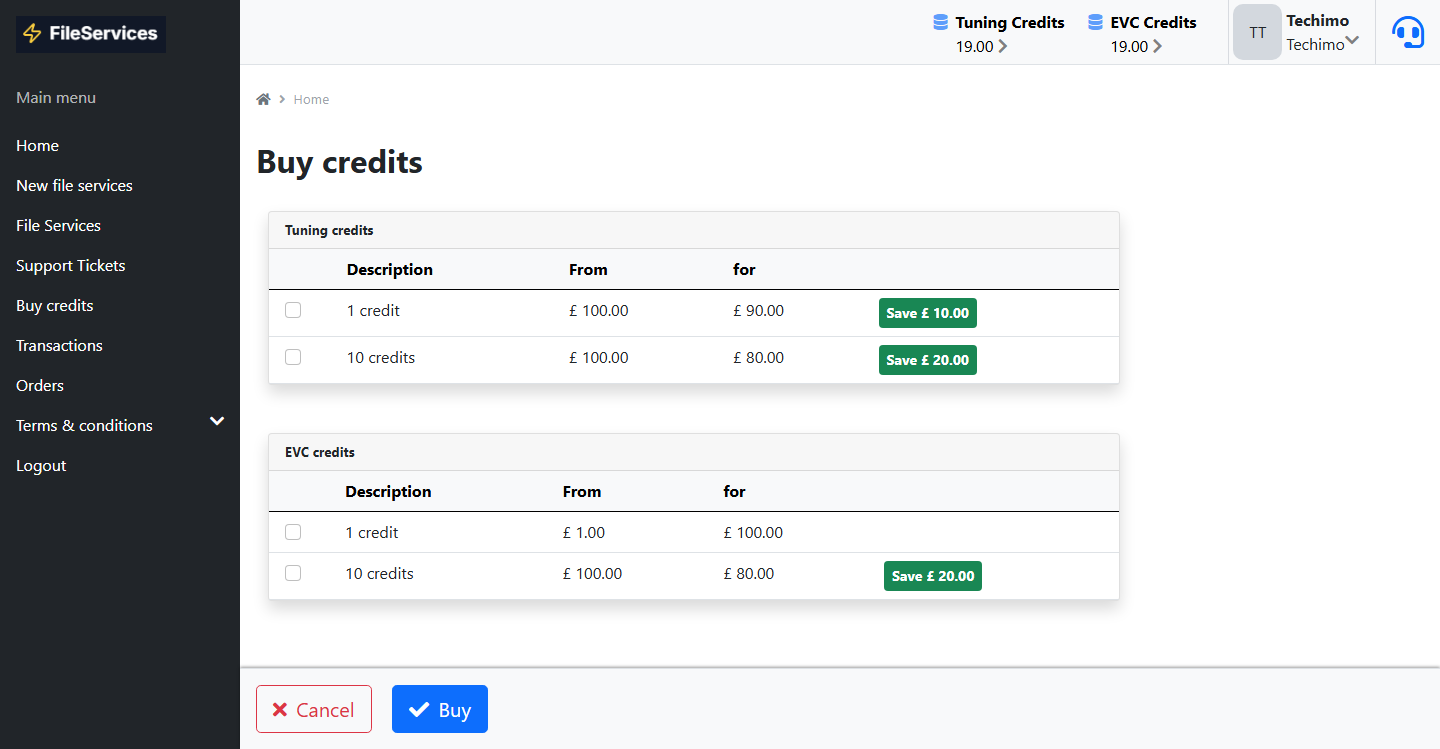
3. Buying Credits (Tuning & EVC Credits)
Users can now purchase credits using either PayPal or Stripe at checkout:
- Tuning Credits – Used for modifying or optimizing vehicle tuning files.
- EVC Credits – Required for file transfers or other platform-specific processes.
How to Buy Credits?
- Navigate to the Credits Section in your account.
- Choose the credit type:
- Tuning Credits
- EVC Credits
- Select the amount you wish to purchase.
- Click Proceed to Payment and select your preferred payment method (PayPal or Stripe).
- For PayPal: Complete the transaction via PayPal Checkout.
- For Stripe: Enter your credit card details securely in the Stripe payment form.
- Once the payment is successful, credits will be added to your account instantly.
Using Credits in Your Tuning File Workflow Management
You can now use separate credits based on your needs in the professional tuning tools platform:
- Tuning Credits: If you only need to share files, you can use tuning credits as required.
- EVC Credits: If you need to read and write file services before tuning using inbuilt machine tools, you can use EVC credits.
- If needed, you can also use both credits together for the file services adding process.
4. Viewing Transaction History
Users can view their transaction history for payments and credit usage from both PayPal and Stripe.
How to Check Your Transaction History?
- Go to Transactions Section in your account.
- See the Transaction History with all payment methods.
- View details of all past transactions, including:
- Date
- Payment Method
- Status
- Tuning credits
- EVC credits
- Total Credits
- Amount
- Description
